How to design your own garden without hiring a pro is a question that more homeowners are asking every year — and not just because professional landscape design fees can run into thousands of dollars. Many people simply want the satisfaction of creating something with their own hands, their own taste, and their own vision. A garden you designed yourself, that reflects your personality and fits your life, can be more rewarding than the most expensively designed outdoor space.
The good news is that great garden design is not magic. It is not an exclusive skill reserved for trained professionals. It is a process — a series of clear, logical steps that, when followed carefully, consistently produce beautiful, functional outdoor spaces. Professionals know this process. Now you will too.
This guide walks you through every stage of designing your own garden from scratch, with honest advice, practical tools, and the kind of detail that most “beginner gardening” articles skip entirely. Whether you have a small urban courtyard, a suburban backyard, or a rambling country plot, the principles are the same. Let’s begin.
Before You Start: The Most Important Rule in Garden Design
Before you move a single plant, dig a single hole, or buy a single bag of compost, there is one rule that separates gardens that work from gardens that disappoint: observe before you act.
Most garden design mistakes happen because homeowners act too quickly. They see a beautiful garden photo online, buy the plants they liked the look of, and stick them in the ground without understanding their own space. Then they wonder why their garden looks nothing like the picture. The reason is almost always the same: they designed for the garden they imagined, not the garden they have.
Your garden has its own specific character — its own sun and shade patterns, its own soil type, its own drainage behaviour, its own microclimate. A design that ignores these realities will always underperform. A design built around them will almost always succeed. So before you do anything else, spend time simply watching and recording what your garden does.
What to Observe Before You Design
- Sun and shade: Stand in your garden at different times of day — morning, midday, late afternoon — and note which areas are in full sun, partial shade, and deep shade at each time. Do this on multiple days and in different seasons if possible. This single piece of information will determine which plants can grow where.
- Wind: Note which direction the prevailing wind comes from and which areas of the garden are exposed or sheltered. Wind affects plant choice, structure placement, and whether outdoor seating areas are comfortable.
- Water: After heavy rain, observe where water pools, where it drains quickly, and where the soil stays wet or dry longest. This tells you about drainage and will guide both plant choice and hard landscaping decisions.
- Views: Stand at the main windows that look into the garden. Note what you see — and what you want to hide or frame. Good design manages views deliberately.
- Existing features: Identify what is already in the garden that you want to keep, what can be moved, and what needs to go. Trees in particular — check which are covered by preservation orders before planning to remove them.
The 8 Steps to Designing Your Own Garden
Measure Your Space Accurately
The foundation of every good design
Every professional garden design starts with an accurate measured survey of the space. Without accurate measurements, you cannot draw a reliable plan, and without a reliable plan, you are essentially designing blind. This step sounds tedious, but it takes less than an hour and makes every subsequent decision easier and more precise.
You will need a long measuring tape — ideally 30 metres or 100 feet — a notepad, and a pencil. Measure the overall dimensions of the garden: length and width at multiple points, because most gardens are not perfectly rectangular. Measure the position of the house wall relative to the garden boundaries. Record the position of existing features you want to keep: trees (including the approximate spread of their canopy), existing paths or patios, garden buildings, water taps, drains, and manholes. Note the position of gates, doors, and windows that open into or look onto the garden.
Transfer these measurements to a simple scale drawing on graph paper. A scale of 1:50 (1cm = 50cm) works well for most residential gardens. This becomes your base plan — the foundation on which you will draw every design option.
Define How You Want to Use the Space
Function before beauty, always
Before you think about what your garden will look like, decide what it needs to do. This is the brief that a professional designer would ask you to write — and it is the single most important document in your design process.
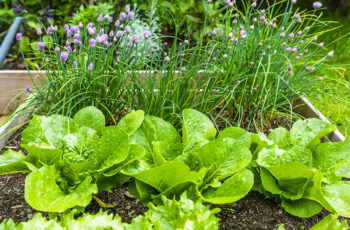
Write down, honestly and specifically, how you want to use your garden. Consider: Do you want a lawn for children or pets to play on? A seating or dining area for entertaining? A kitchen garden for growing vegetables and herbs? A quiet retreat for reading and relaxation? A wildlife-friendly space with naturalistic planting? A low-maintenance garden that looks good with minimal effort? Somewhere to grow cut flowers?
Most gardens need to do several things at once — and good design creates distinct zones for different uses without the space feeling divided or cluttered. Prioritise your list. The things at the top will drive the design; the things lower down will fit around them.
- Must-haves: things the garden absolutely needs to have
- Would-loves: things you want if space and budget allow
- Definitely nots: things you specifically do not want, regardless of how popular they are
Choose Your Design Style
Give your garden a coherent identity
One of the most common reasons DIY garden designs look unfinished or muddled is that they lack a coherent style. A garden that mixes formal geometric beds with wild naturalistic planting, contemporary concrete with rustic timber, and a Japanese maple next to a Provençal lavender border ends up looking like an accident rather than a decision.
Choosing a design style does not mean copying a look from a magazine. It means deciding on the underlying language of your garden — the shapes, materials, and planting vocabulary that will make everything feel connected and intentional.
Some popular residential garden styles to consider:
- Contemporary / Modern: Clean lines, geometric shapes, restrained plant palette, high-quality materials. Works well with modern architecture.
- Cottage / English: Informal curved borders, abundant planting, soft colour palette, traditional materials like brick and timber. Forgiving and romantic.
- Mediterranean: Drought-tolerant plants, terracotta, gravel, herbs, olive trees. Works beautifully in warm, sunny, dry gardens.
- Naturalistic / Wildlife: Native plants, meadow grass, loose informal structure, water features for wildlife. Low maintenance once established.
- Tropical: Bold foliage, large-leaved plants, lush density. Requires a sheltered, reasonably warm garden and more maintenance.
- Minimalist: Very few plant species, strong structural plants, restrained palette. Requires precise execution but is extremely effective.
Gather 20 to 30 images of gardens you love — from Pinterest, Houzz, or garden magazines — and look for the common thread. That thread is your style direction.
Plan Your Layout on Paper First
Design twice, dig once
Now you bring your measurements, your brief, and your style direction together into an actual layout. Using tracing paper laid over your base plan, sketch different design options without committing to anything. The tracing paper allows you to try multiple layouts quickly, discard what does not work, and build on what does.
Start with the largest elements first — the lawn (if you want one), the main seating or terrace area, and any significant planting beds. Establish the flow of movement through the garden: how do you get from the house to the seating area? From the seating area to the kitchen garden? Good design has clear, logical routes that feel natural to walk.
Think about proportion. The single biggest design error beginners make is creating beds and borders that are too small relative to the space. In a medium-sized garden, a border that is only 60cm (2 feet) deep will look thin and unconvincing. Deep borders — 1.5 to 2 metres or more — allow for layered planting that looks rich and full.
Consider the view from the house. Stand at your main window and look at your sketched layout. Does the eye have somewhere to rest? Is there a focal point — a feature tree, a pot, a sculpture, a seating area — that draws the gaze? Every garden needs at least one strong focal point to give it structure and purpose.
Plan Your Hard Landscaping
Get the structure right — it’s expensive to change later
Hard landscaping — paths, patios, steps, raised beds, walls, and any structures — is the skeleton of your garden. It defines the layout, creates the functional areas, and sets the visual tone. It is also the most expensive element of any garden project, and the hardest to change once installed. Get these decisions right before anything else.
For material selection, apply a simple rule: choose materials that relate to the house and its surroundings. A red brick path suits a red brick house. Natural stone suits a stone cottage. Contemporary concrete or porcelain pavers suit a modern rendered house. Mixing too many different hard materials creates visual chaos — two or three complementary materials is usually the maximum.
- Patio size: Most homeowners underestimate how large a patio needs to be to feel comfortable. For a dining table for four, you need at least 3m x 3m. For six people, aim for 4m x 4m or larger.
- Path width: A path that two people can walk along side by side needs to be at least 1.2m wide. For single file, 60–80cm is the minimum.
- Steps: Garden steps should have a gentle rise (no more than 15cm) and a generous tread (at least 38cm). Steep, narrow steps feel unwelcoming and are a safety hazard.
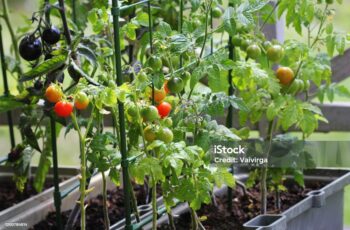
- Raised beds: The ideal depth for most vegetables is 30–40cm. Width should be no more than 1.2m so you can reach the centre from either side without stepping in.
Create Your Planting Plan
The right plant in the right place, every time
Planting is where most DIY gardeners feel most uncertain — and where good observation from Step 1 pays off completely. The professional approach to planting design follows a simple hierarchy: start with the largest plants (trees and large shrubs), then medium shrubs, then perennials, then ground cover, then bulbs and annuals for seasonal colour. Think of it as building from the skeleton down to the skin.
For each plant position, ask three questions before choosing: Does it suit my soil? Does it suit my light conditions? Does it suit my climate zone? A plant that ticks all three will almost certainly thrive. A plant that fails on any one of them will struggle or die, regardless of how beautiful it looks in the nursery.
In terms of design principles for planting, professionals use a few key techniques that are easy to apply yourself:
- Plant in odd numbers: Groups of 3, 5, or 7 plants of the same species look more natural and lush than even-numbered groups or single specimens (except for deliberately placed focal point plants).
- Repeat plants through the border: Using the same plant in three or four different places through a border creates rhythm and coherence. It ties the design together visually.
- Layer heights: Place taller plants at the back of a border, medium-height plants in the middle, and lower-growing plants at the front. This ensures every plant is visible and the border has depth.
- Plan for all seasons: Include plants that offer interest in each season — spring bulbs, summer perennials, autumn berries and foliage colour, winter structure from evergreens and seedheads.
- Leave space for growth: Plants almost always grow larger than they look in the nursery pot. Check the ultimate spread of each plant and space accordingly — even if the border looks sparse at first.
Set Your Budget and Prioritise
Do it in stages — there is no shame in phasing a project
One of the most liberating truths about DIY garden design is that you can implement it in phases. You do not need to do everything at once. In fact, phasing a garden project often produces better results — you learn from early stages, you give yourself time to see how the space is working, and you avoid the financial strain of doing everything simultaneously.
A sensible phasing approach puts the elements that are expensive or difficult to change first — hard landscaping, drainage, soil improvement — and leaves the planting for later phases, when the structure is established. Plants can be added gradually, and many can be divided and propagated over time to fill space without additional cost.
| Garden Element | Typical DIY Cost | Phase | Notes |
|---|---|---|---|
| Soil improvement / compost | $50–$200 | Phase 1 | Always do this first — everything else depends on it |
| Basic patio (gravel or pavers) | $200–$800 | Phase 1 | DIY with hired tools; harder surfaces cost more |
| Raised beds (timber) | $80–$300 each | Phase 1 | Excellent DIY project, highly satisfying result |
| Lawn (seed) | $40–$120 | Phase 1 | Seed is far cheaper than turf; takes 6–8 weeks to establish |
| Structural shrubs | $15–$60 each | Phase 2 | Buy smaller sizes — they establish better and cost less |
| Perennials | $6–$20 each | Phase 2 | Many can be divided after 2–3 years to multiply for free |
| Bulbs | $10–$40 per bag | Phase 2 | Outstanding value — one bag produces years of colour |
| Lighting | $50–$300 | Phase 3 | Solar options are increasingly effective and require no wiring |
| Garden furniture | $100–$1,000+ | Phase 3 | Second-hand and upcycled pieces work beautifully in gardens |
Use Free and Low-Cost Design Tools
Technology makes DIY design easier than ever
You do not need expensive software or professional CAD programs to produce a good garden design. There are excellent free and low-cost tools available that make the drawing and planning process significantly easier than working purely on paper.
- Graph paper and pencil: Still the most flexible and honest tool for sketching layouts. Cheap, tactile, and requires no screen time.
- RHS Garden Planner (online): A user-friendly web-based tool specifically designed for vegetable garden planning. Free to use for a trial period.
- SketchUp Free: A 3D modelling tool with a learning curve, but capable of producing impressive garden models once you get to grips with it.
- Canva: Not specifically a garden tool, but useful for creating mood boards, plant palettes, and presentation-quality design documents.
- Google Maps satellite view: Use it to get an accurate bird’s-eye view of your property and verify dimensions before drawing your base plan.
- Pinterest and Houzz: Invaluable for gathering inspiration and building a visual brief for your own design.
- Your local nursery: Underestimated as a free resource. Good nursery staff know your local climate, soil, and growing conditions intimately. Their advice on plant selection is often better than anything you will find online.
Common DIY Garden Design Mistakes — and How to Avoid Them
Even with the best intentions, DIY garden designers fall into a few predictable traps. Knowing them in advance makes them easy to sidestep.
| Mistake | Why It Happens | How to Avoid It |
|---|---|---|
| Borders too narrow | Looks fine on paper, underwhelming in reality | Minimum 1.5m depth for any serious border |
| Wrong plants for conditions | Choosing plants by looks, not suitability | Always check sun, soil, and hardiness zone first |
| No focal point | Design lacks a visual anchor | Add one strong focal point visible from the house |
| Patio too small | Seems adequate until furniture goes in | Always design at least 20% larger than you think you need |
| Plants too close together | Ignoring ultimate size at point of planting | Check mature spread and space accordingly, filling gaps with annuals temporarily |
| No seasonal interest | Planting only summer-flowering species | Include plants for spring, autumn, and winter interest deliberately |
| Skipping soil preparation | Eager to plant, skips the unglamorous prep work | Improve soil before planting — it makes everything else easier |
| No design for maintenance | Design looks good but is impractical to maintain | Ask honestly how much time you can give each week and design accordingly |
“The best garden designs are not the most complicated ones. They are the ones that fit the life of the person who tends them — and that feel inevitable, as if they could not be any other way.”
Free Resources Worth Knowing About
Where to Learn More for Free
- RHS website (rhs.org.uk): The Royal Horticultural Society’s plant database and gardening advice library is one of the most comprehensive free resources in the world. Includes plant finders, seasonal advice, and problem-solving guides.
- Your local cooperative extension service (U.S.): Each U.S. state has an extension service connected to a land-grant university, providing free, locally specific gardening advice. Search “[your state] cooperative extension gardening.”
- Local library: Garden design books by designers like Piet Oudolf, Dan Pearson, and Christopher Lloyd contain more practical wisdom per page than most online sources combined — and they are free to borrow.
- Open garden events: Many private garden owners open their gardens to the public through schemes like the National Garden Scheme (UK) or American Horticultural Society events. Walking through well-designed gardens in your climate zone is one of the fastest ways to develop your design eye.
- YouTube: Channels from RHS, Monty Don, and numerous horticultural colleges provide excellent free instruction on planting design, soil preparation, and garden maintenance.
When to Call in a Pro Anyway
This guide is about designing your own garden — but honesty requires acknowledging that there are situations where professional input genuinely saves money and prevents problems, even for capable and enthusiastic DIY gardeners.
Consider at least a one-off professional consultation if: your site has a significant slope requiring retaining walls; you have drainage problems that keep water pooling after rain; you are unsure about soil conditions that have resisted previous planting attempts; or your project involves building structures that may require planning permission. A single two-hour consultation with a qualified designer typically costs $100 to $300 and can provide the specific, expert guidance that makes the difference between a project that works and one that does not.
Think of it this way: designing the garden yourself is not about proving you do not need help. It is about being the author of your own outdoor space, making the decisions, and doing the rewarding work. Getting expert input on one specific technical challenge does not undermine that — it supports it.
Frequently Asked Questions
The Bottom Line
Designing your own garden without hiring a pro is entirely achievable — not just as a cost-saving measure, but as a genuinely rewarding creative project. The process is logical, the tools are accessible, and the knowledge you need is freely available. What it requires, more than anything else, is patience: patience to observe your space before you act, to plan carefully before you plant, and to implement thoughtfully rather than all at once.
Follow the eight steps in this guide. Measure first. Define what you need the garden to do. Choose a style and stick to it. Plan the structure before the planting. Choose plants for your actual conditions. Budget for phases rather than trying to do everything at once. Use the free tools available to you.
The garden you have always wanted is not locked behind a professional fee. It is waiting in the space you already have — you just need to start designing it.
️ Your DIY Garden Design Toolkit
- 30m measuring tape — for your site survey
- Graph paper and pencil — for your base plan and layout sketches
- Tracing paper — for overlaying design options without committing
- Compass — to record north and understand sun patterns accurately
- Soil test kit — available at garden centres for $10–$20, tells you pH and basic nutrient levels
- Pinterest board or physical folder — for gathering and organising design inspiration
- Notebook — for recording your observations, plant ideas, and decisions
- Camera or smartphone — photograph your garden at different times of day and in different seasons
