Starting seeds indoors transforms your gardening from dependent on whatever plants the garden center stocks to having unlimited variety and getting exactly the vegetables, flowers, and herbs you want. It also extends your growing season significantly, giving plants a head start so they produce earlier and more abundantly than direct-seeded plants.
My first attempt at seed starting was a disaster. I planted seeds in regular potting soil, set them on a windowsill, and waited. Most never sprouted. Those that did became leggy, pale, and weak. By the time I transplanted them outside, they were so stunted they performed worse than plants I could have bought.
That failure taught me that successful seed starting requires understanding a few key principles – proper timing, adequate light, appropriate temperature, and correct soil moisture. Once I learned these basics and invested in simple equipment, my success rate jumped to near 100%. Now I start dozens of varieties every spring, filling my garden with plants I could never find at nurseries and saving hundreds of dollars compared to buying transplants.
This comprehensive guide covers everything you need to know to successfully start seeds indoors, from equipment and timing to troubleshooting common problems. Whether you want to grow heirloom tomatoes, unusual flower varieties, or simply save money, indoor seed starting opens a world of possibilities.
Why Start Seeds Indoors?
Understanding the benefits helps motivate you through the learning curve and small investment required.
Variety selection expands dramatically when you grow from seed. Garden centers stock maybe a dozen tomato varieties. Seed catalogs offer hundreds. Want purple cauliflower? German heirloom tomatoes? Unusual flower colors? They’re all available as seeds but rarely as transplants.
I grow vegetables and flowers I’ve never seen for sale as plants simply because I can start them from seed. This variety is the primary reason I started seed starting.
Cost savings are substantial if you grow many plants. A packet of seeds costing three dollars often contains 25-100 seeds. Comparable transplants would cost $50-300. Even after equipment costs, seed starting pays for itself within a season or two.
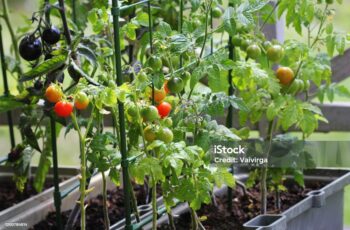
Earlier harvests result from the head start indoor sowing provides. Tomatoes started indoors in March produce ripe fruit weeks before directly seeded plants. This matters especially in short-season climates where every week counts.
Disease control improves when you start your own seeds. Transplants from garden centers sometimes carry diseases that infect your garden. Seeds from reputable sources are generally disease-free, and the clean environment you create indoors prevents early infection.
Personal satisfaction comes from taking plants through their entire life cycle. There’s something special about eating a tomato from a plant you started as a tiny seed months earlier.
What You Need to Start Seeds Indoors
Successful seed starting requires specific supplies. You don’t need everything immediately, but these items make a real difference.
Seed Starting Mix
Regular potting soil is too heavy for seed starting. Specialized seed starting mix is lightweight, sterile (preventing disease), and provides ideal conditions for germination.
Seed starting mix typically contains peat moss or coco coir, perlite or vermiculite, and sometimes small amounts of fertilizer. It holds moisture without staying soggy and allows delicate seedling roots to penetrate easily.
I’ve tried starting seeds in regular potting soil and the difference is dramatic. Germination is slower and less reliable, and seedlings develop weaker root systems.
Cost: $10-20 per large bag (enough for hundreds of seedlings)
Containers
Anything that holds soil and has drainage holes can work, but some options are better than others.
Cell packs (the plastic trays with individual cells) work well and are reusable. Choose ones with drainage holes.
Seedling trays with individual cells are my preference. Each seedling has its own space, making transplanting easier and reducing root disturbance.
Peat pots or coir pots are biodegradable and can be planted directly into the garden, eliminating transplant shock. However, they dry out quickly and sometimes don’t decompose as advertised.
Recycled containers like yogurt cups, egg cartons, or newspaper pots save money. Just ensure adequate drainage by poking holes in the bottom.
I use a mix of purchased cell trays (reused for years) and homemade newspaper pots for plants that dislike transplanting.
Cost: $5-15 for reusable trays, or free for recycled containers
Grow Lights
This is where many beginners fail. Windowsills rarely provide adequate light for healthy seedling growth. Even south-facing windows in winter don’t deliver the intensity seedlings need.
Insufficient light creates leggy, weak seedlings that stretch desperately toward the light source. These plants struggle when transplanted and often never catch up to properly grown seedlings.
Grow lights provide consistent, adequate light regardless of weather or window orientation. Modern LED grow lights are energy-efficient, long-lasting, and affordable.
Full spectrum LED shop lights work excellently and cost less than specialized grow lights. I use standard 4-foot LED shop lights positioned 2-3 inches above seedlings, running 14-16 hours daily.
Cost: $20-40 for basic LED shop lights, or $50-100+ for specialized grow light systems
Heat Mat (Optional but Helpful)
Many seeds germinate better with bottom heat. Heat mats warm soil to optimal germination temperatures (typically 70-85°F depending on species).
Seeds germinate in room temperature soil, but heat mats speed germination significantly and increase success rates, especially for warm-season crops like tomatoes, peppers, and eggplants.
I use heat mats for germination, then move seedlings under lights once they sprout since established seedlings don’t need bottom heat.
Cost: $20-40 for basic heat mats
Humidity Dome (Optional)
Clear plastic covers that fit over seed trays maintain humidity during germination. Seeds need consistent moisture to germinate, and domes prevent soil surface from drying out between waterings.
Once seeds sprout, remove domes to prevent fungal problems from excessive humidity.
Cost: $5-15, or free if you use clear plastic wrap
Other Supplies
Small fan provides air circulation that strengthens stems and prevents fungal diseases. Position it to gently move air around seedlings without blowing directly on them.
Watering can with fine rose or spray bottle waters gently without washing seeds away or damaging delicate seedlings.
Labels are essential for tracking varieties. Trust me, you’ll think you’ll remember what’s what, but you won’t.
Timer for grow lights automates the lighting schedule, ensuring seedlings get consistent day length.
When to Start Seeds Indoors
Timing is critical for success. Start too early and seedlings outgrow their containers before outdoor planting time. Start too late and you lose the advantage of indoor starting.
Work backward from your last frost date. Most seed packets indicate how many weeks before last frost to start seeds indoors. This varies by plant.
Typical timing:
- Slow-growing plants (12-14 weeks before last frost): Begonias, pansies, snapdragons
- Medium-speed plants (8-10 weeks): Tomatoes, peppers, eggplants
- Fast-growing plants (4-6 weeks): Cucumbers, squash, melons
- Very fast plants (2-4 weeks): Lettuce, basil, marigolds
I create a simple calendar in January, marking when to start each crop based on my last frost date (typically mid-May). This prevents starting everything at once or forgetting crops entirely.
Succession planting indoors extends harvest seasons. Start a new flat of lettuce or basil every two weeks rather than starting everything at once.
Step-by-Step Seed Starting Process
Following these steps ensures healthy seedlings ready for garden success.
1. Prepare Containers and Soil
Fill containers with moistened seed starting mix. Don’t use dry mix – moisten it first by adding water and mixing thoroughly until it’s evenly damp but not soggy. This prevents dry mix from repelling water later.
I mix my seed starting medium in a large bin, adding water gradually and mixing until it feels like a wrung-out sponge – moist but not dripping.
Firm the soil gently to eliminate large air pockets but don’t compact it. Seedling roots need both moisture and air.
2. Plant Seeds at Proper Depth
General rule: plant seeds at a depth two to three times their diameter. Tiny seeds (like lettuce or petunia) barely need covering – just press them into the soil surface. Large seeds (like beans or squash) go deeper.
Too deep: Seeds use all their energy reaching the surface and emerge weak or don’t emerge at all.
Too shallow: Seeds dry out before germinating or wash away during watering.
Follow seed packet directions for specific depths. They’re surprisingly important.
Space seeds appropriately. Some seeds are sown multiple per cell and thinned later. Others are sown one per cell.
3. Water Gently
Moisten soil thoroughly without washing seeds away. I use a spray bottle for tiny seeds and a watering can with a fine rose for larger seeds and established seedlings.
The goal is evenly moist soil throughout the container, not just on the surface.
4. Provide Warmth for Germination
Place containers on heat mats if you have them, or in a warm location. Top of the refrigerator often works. Most seeds germinate best at 70-75°F, though some prefer warmer (80-85°F for peppers, eggplants) or cooler (60-65°F for lettuce, pansies).
Cover with humidity domes or plastic wrap to maintain moisture during germination.
Check daily for sprouting. Remove covers immediately when seedlings emerge.
5. Provide Adequate Light
Move seedlings under lights as soon as they emerge. Position lights 2-3 inches above seedlings and raise them as plants grow, maintaining that close distance.
Run lights 14-16 hours daily using a timer for consistency.
Insufficient light shows within days – seedlings stretch tall and thin searching for light. They’ll never fully recover from this early light starvation.
I learned this the hard way. Now I’m militant about providing adequate light from day one.
6. Maintain Proper Temperature
Once germinated, most seedlings prefer slightly cooler temperatures (60-70°F) than germination required. This encourages stocky, strong growth rather than weak, stretched stems.
Remove heat mats once seedlings emerge and move them to a location with good light but moderate temperature.
7. Water Carefully
Keep soil consistently moist but never soggy. Overwatering kills more seedlings than underwatering.
Water when the soil surface feels dry to the touch. I stick my finger into the soil – if it’s dry an inch down, I water.
Water from below if possible by setting containers in a tray of water and letting them absorb moisture. This encourages deep root growth.
8. Fertilize Lightly
Seed starting mix contains minimal nutrients. Once seedlings develop true leaves (the second set that appears, different from the initial seed leaves), begin fertilizing.
Use diluted liquid fertilizer at one-quarter to one-half strength weekly. Too much fertilizer creates soft, weak growth.
I use fish emulsion at half strength once weekly starting when true leaves develop.
9. Thin Seedlings
If you planted multiple seeds per cell, thin to the strongest seedling once they develop true leaves. This seems wasteful but crowded seedlings all struggle.
Snip extras at soil level with scissors rather than pulling them out, which disturbs roots of the seedling you’re keeping.
10. Pot Up if Necessary
If seedlings outgrow their containers before outdoor planting time, transplant them to larger pots. This prevents root-bound plants and maintains vigorous growth.
I rarely need to do this with vegetables but often pot up slower-growing flowers started very early.
Hardening Off: The Critical Transition
Hardening off gradually acclimates indoor seedlings to outdoor conditions. Skip this step and your carefully grown seedlings may wilt, sunburn, or even die within hours of transplanting.
Indoor conditions are gentle – no wind, consistent temperature, filtered or artificial light. Outdoor conditions are harsh in comparison.
Hardening off process takes 7-10 days:
Days 1-2: Place seedlings outdoors in complete shade for 1-2 hours Days 3-4: Increase to 2-3 hours in dappled shade Days 5-6: Move to morning sun, afternoon shade for 3-4 hours Days 7-8: Full sun for 4-6 hours Days 9-10: Leave out overnight if temperatures permit Day 11: Transplant to garden
Don’t rush this process. I’ve lost entire flats of seedlings by hardening off too quickly.
Bring seedlings inside if severe weather threatens during the hardening off period.
Common Problems and Solutions
Even experienced seed starters encounter problems. Knowing how to identify and fix them prevents disaster.
Seeds don’t germinate:
- Soil too cold or too warm
- Seeds planted too deep
- Soil dried out
- Old seeds with low viability
- Wrong conditions for that species
Leggy, stretched seedlings:
- Insufficient light (most common cause)
- Too warm temperatures
- Inadequate air circulation
Damping off (seedlings collapse and die):
- Fungal disease from overwatering
- Contaminated soil or containers
- Poor air circulation
- High humidity with stagnant air
Yellow leaves:
- Nutrient deficiency (start fertilizing)
- Overwatering
- Underwatering
Slow, stunted growth:
- Too cold
- Insufficient light
- Nutrient deficiency
- Root bound in small containers
Tips for Seed Starting Success
These practices have dramatically improved my success rate over the years.
Keep detailed notes about planting dates, varieties, and results. These records inform future seed starting decisions.
Start small your first year. Master 4-6 varieties before attempting dozens. Success breeds confidence.
Invest in good lighting. This single factor determines success or failure more than anything else.
Be patient with germination. Some seeds sprout in days, others take weeks. Don’t give up prematurely.
Label everything immediately. You absolutely will not remember which container has which variety.
Join online communities where you can ask questions and share experiences with other seed starters.
Start easy crops first – tomatoes, basil, marigolds, and zinnias are all forgiving and encourage beginners.
The Reward of Seed Starting
The first year I successfully started seeds indoors, I grew 60 tomato plants, 24 pepper plants, 48 basil plants, and hundreds of flowers from about $30 worth of seeds. Comparable transplants would have cost $300-400.
Beyond the financial savings, I grew varieties I’d only dreamed about – Cherokee Purple tomatoes, Lemon Drop peppers, purple basil, and dozens of unique flowers. My garden exploded with diversity and abundance that simply wasn’t possible buying transplants.
The process itself becomes enjoyable. Winter transforms from dead time waiting for spring into an active growing season with trays of seedlings filling sunny spaces with green life and possibility.
Start simple, expect some failures while you learn, and soon you’ll be confidently starting seeds for an abundant, unique garden that reflects your personal taste rather than what’s available at the garden center.
Your garden begins indoors, months before outdoor planting. Master seed starting, and you master the foundation of gardening success.