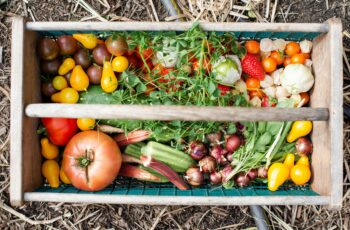
There’s something incredibly satisfying about growing your own peppers. Whether you love sweet bell peppers for salads and stir-fries or crave the heat of jalapeños and habaneros, homegrown peppers have a flavor and freshness that store-bought ones can’t match.
I started growing peppers almost by accident. My first garden included two bell pepper plants that came as part of a vegetable starter pack, and honestly, I didn’t expect much from them. But those two plants produced so many beautiful peppers that I was hooked. The next year I tried hot peppers, and now I grow at least ten different pepper varieties every season.
Here’s what I’ve learned: peppers are actually easier to grow than tomatoes in many ways, but they have specific requirements that, when met, result in incredibly productive plants. Ignore those requirements, and you’ll get disappointing, stunted plants with few fruits.
This guide covers everything you need to know to grow abundant peppers, whether you’re after sweet bells, mild poblanos, or super-hot ghost peppers.
Understanding Pepper Types and Varieties
Peppers fall into two main categories, and understanding the difference helps you choose what to grow and how to use them.
Sweet peppers have no heat and are eaten raw or cooked. Bell peppers are the most common, but this category also includes sweet banana peppers, pimientos, and Italian frying peppers. These are perfect for people who don’t enjoy spicy food or want peppers for salads, stuffing, and general cooking.
Hot peppers range from mildly warm to painfully spicy, measured in Scoville Heat Units (SHU). Jalapeños are fairly mild at 2,500-8,000 SHU. Habaneros bring serious heat at 100,000-350,000 SHU. Ghost peppers and Carolina Reapers reach over a million SHU.
When I started growing hot peppers, I underestimated their heat. I chopped jalapeños without gloves and touched my face – huge mistake. Always wear gloves when handling hot peppers, and never touch your eyes or face.
Popular varieties to consider:
For sweet peppers, California Wonder and King Arthur are reliable bell peppers that produce large, blocky fruits. Sweet Banana peppers are mild and productive. Lipstick peppers are sweet, pointed peppers perfect for roasting.
For mild heat, Poblanos (1,000-2,000 SHU) are perfect for stuffing and roasting. Anaheim peppers are similarly mild and versatile. Shishito peppers are mostly mild with an occasional hot one – fun for grilling.
For medium heat, Jalapeños are the classic choice – flavorful with moderate heat. Serranos are similar but slightly hotter and smaller. Hungarian Wax peppers offer medium heat with a sweet undertone.
For serious heat, Habaneros pack intense heat with fruity flavor. Thai chilies are small but mighty. Scotch Bonnets are Caribbean favorites with extreme heat.
Choose varieties based on your heat tolerance and intended use. If you’re new to growing peppers, start with one sweet variety and one mild hot pepper to get a feel for their care requirements.
Starting Pepper Plants
Peppers need a long, warm growing season – typically 60-90 days from transplanting to first harvest, depending on variety. In most climates, this means starting seeds indoors or buying transplants.
Starting from seed requires planning eight to ten weeks before your last expected frost date. Pepper seeds germinate slowly, especially in cool conditions. They need soil temperature of 70-80°F to sprout, which usually takes seven to fourteen days.
I use a seedling heat mat to maintain consistent temperature – this single investment improved my germination rates dramatically. Without bottom heat, pepper seeds take forever to germinate or don’t sprout at all.
Plant seeds a quarter-inch deep in seed-starting mix, keep soil consistently moist (not soggy), and provide bright light once seeds sprout. Inadequate light creates leggy, weak seedlings that struggle after transplanting.
Buying transplants is perfectly fine and often easier for beginners. Choose stocky plants with dark green leaves and thick stems. Avoid plants that are already flowering or fruiting – while tempting, these often transplant poorly and may never produce abundantly.
The healthiest transplants are six to eight inches tall with no flowers. If you buy flowering plants, pinch off the flowers before planting. This seems counterintuitive, but it allows plants to establish strong root systems that support heavier production later.
Preparing the Perfect Growing Spot
Peppers are even more heat-loving than tomatoes. They need specific conditions to thrive and produce well.
Full sun is mandatory – at least six to eight hours of direct sunlight daily. In extremely hot climates (consistent temperatures above 95°F), afternoon shade can actually help because excessive heat causes flowers to drop without setting fruit. But in most areas, more sun means more peppers.
I made the mistake of planting peppers in a spot that seemed sunny but was shaded by the house during peak afternoon hours. The plants grew but produced very few peppers. When I moved my pepper patch to full sun the next year, production tripled.
Soil should be well-draining and rich in organic matter. Peppers don’t tolerate waterlogged conditions. If your soil is heavy clay that stays wet, either improve drainage by adding lots of compost or grow peppers in raised beds.
Ideal soil pH is slightly acidic to neutral (6.0-7.0). Too acidic or alkaline soil limits nutrient availability. If you haven’t tested your soil, it’s worth doing – home test kits are inexpensive and eliminate guesswork.
Warm soil is critical before planting. This is where many gardeners go wrong, planting peppers at the same time as tomatoes. Peppers need warmer soil – at least 65°F, ideally 70°F or warmer. Cold soil stunts growth dramatically, and plants may never recover fully.
Wait two to three weeks after your last frost date to plant peppers. In most areas, this means late spring when soil has thoroughly warmed and nighttime temperatures stay consistently above 55°F.
Planting Peppers for Success
How you plant affects the entire growing season, so it’s worth doing right.
Space plants properly. Peppers need 18-24 inches between plants for adequate air circulation. Crowding promotes disease and reduces production. Yes, the garden looks sparse initially, but plants fill in quickly once they start growing.
Prepare planting holes by digging holes slightly larger than root balls and mixing in compost and a handful of balanced fertilizer. I also add a crushed eggshell or tablespoon of lime for calcium, which prevents blossom end rot.
Plant at the same depth plants were growing in their pots. Unlike tomatoes, peppers don’t develop additional roots along buried stems, so there’s no benefit to planting deeply. Setting plants too deep can actually cause stem rot.
Water thoroughly after planting to settle soil around roots. Then water regularly until plants establish and begin growing actively.
Protect young plants if cool weather threatens. Peppers are sensitive to cold – even temperatures in the 50s slow growth significantly. Use row covers, cloches, or even overturned buckets if unexpected cool nights occur after planting.
Watering Requirements
Peppers need consistent moisture but don’t tolerate constantly soggy soil. Finding the right balance is key to healthy, productive plants.
Establish a regular watering schedule based on your soil and weather. Most peppers need about an inch of water per week from rain or irrigation. Sandy soil drains quickly and needs more frequent watering. Clay soil holds moisture longer.
I check soil moisture by sticking my finger two inches deep near plants. If it’s dry at that depth, I water. During peak production in midsummer, this might be every other day in hot weather or twice weekly in moderate temperatures.
Water deeply to encourage deep root growth. Light, frequent watering creates shallow roots that make plants more susceptible to drought stress. Deep watering means soaking soil eight to ten inches down, where most roots grow.
Maintain consistency as much as possible. Fluctuations between wet and dry stress plants, cause blossom drop, and contribute to blossom end rot. Mulching helps tremendously by moderating soil moisture.
Apply mulch once soil has warmed thoroughly, typically early summer. Use two to three inches of organic mulch like straw, shredded leaves, or grass clippings. Keep mulch a few inches away from stems to prevent rot.
Water at soil level rather than overhead. Drip irrigation or soaker hoses work excellently. Overhead watering wastes water through evaporation and promotes fungal diseases by keeping foliage wet.
Fertilizing for Maximum Production
Peppers are moderate feeders – not as hungry as tomatoes but still requiring regular nutrients for best production.
At planting, incorporate compost and balanced fertilizer into planting holes. This provides initial nutrients as plants establish.
Once plants begin flowering, switch to fertilizer lower in nitrogen and higher in phosphorus and potassium (like 5-10-10). Excessive nitrogen creates lush foliage at the expense of fruit production.
I side-dress plants every three to four weeks once they start setting fruit. Sprinkle a handful of granular fertilizer around each plant about six inches from the stem, scratch it into the soil surface, and water thoroughly.
Watch for deficiency signs. Yellowing leaves might indicate nitrogen deficiency. Purple-tinged leaves suggest phosphorus deficiency. Blossom end rot (dark, sunken spots on fruit bottoms) indicates calcium deficiency or inconsistent watering affecting calcium uptake.
Don’t over-fertilize. More isn’t better with fertilizer. Excess nutrients, especially nitrogen, create problems including excessive foliage, fewer fruits, and increased susceptibility to pests and diseases.
Supporting Pepper Plants
Most pepper varieties benefit from support, especially once they’re loaded with fruit. Heavy pepper-laden branches break easily without support.
Small pepper cages work well for compact varieties. Choose cages at least two feet tall and secure them at planting time to avoid damaging roots later.
Stakes are my preferred support method. Drive a three to four-foot stake about six inches from each plant at transplanting time. As plants grow, loosely tie the main stem to the stake using soft ties or strips of cloth.
Don’t tie too tightly – allow some movement which strengthens stems. The goal is preventing plants from toppling under fruit weight, not completely restricting movement.
For tall varieties like some hot peppers that reach three to four feet, taller stakes or tomato cages provide necessary support.
Pruning and Maintenance
Unlike tomatoes, peppers don’t require extensive pruning. However, some selective pruning improves production.
Pinch off early flowers on young transplants before they’ve established. This seems counterintuitive, but it directs energy into root and foliage growth rather than premature fruiting. You’ll get more peppers overall from well-established plants.
Prune suckers below the first Y where the stem splits. Remove shoots emerging below this point, as they don’t produce well and divert energy from productive growth above.
Topping plants can increase production in some varieties. When plants reach about 12 inches tall, pinch out the growing tip. This encourages branching, creating bushier plants with more flowering sites.
I don’t top all my peppers – I experiment with a few plants each year to compare results. Some varieties respond better than others.
Remove damaged or diseased foliage promptly to prevent problems from spreading. Otherwise, peppers generally need minimal pruning.
Common Problems and Solutions
Peppers face fewer problems than tomatoes, but issues do occur. Early recognition and quick action prevent minor problems from becoming major losses.
Blossom drop – flowers falling off without setting fruit – frustrates many pepper growers. It’s usually caused by temperature extremes. Nights below 55°F or days above 95°F stress plants and cause blossom drop. There’s not much you can do except wait for better conditions. Plants typically resume setting fruit when temperatures moderate.
Blossom end rot appears as dark, sunken spots on fruit bottoms. It’s caused by calcium deficiency or more commonly, inconsistent watering that prevents calcium uptake. Maintain consistent soil moisture and ensure adequate calcium in soil.
Aphids cluster on new growth, sucking plant sap and potentially spreading viruses. Blast them off with water or use insecticidal soap for heavy infestations.
Hornworms and other caterpillars occasionally munch on pepper foliage. Hand-pick them or use BT (Bacillus thuringiensis), an organic control safe for humans and beneficial insects.
Bacterial leaf spot causes dark spots on leaves and sometimes fruit. It spreads via water splash, so avoid overhead watering. Remove affected leaves and improve air circulation.
Sunscald appears as pale, papery patches on fruits exposed to intense sun. It’s common after heavy pruning suddenly exposes fruits. Maintain adequate foliage to shade developing fruits.
Harvesting Your Pepper Crop
Knowing when and how to harvest comes with experience, but these guidelines help.
Bell peppers and most sweet peppers can be harvested green or left to ripen to their mature color (red, yellow, orange, or purple depending on variety). Green peppers are fully edible but less sweet. Fully ripe colored peppers have better flavor and higher vitamin content.
I harvest some green for immediate use and leave others to fully ripen for better flavor. Harvesting some green also encourages plants to produce more fruits.
Hot peppers can also be harvested at any stage. Green jalapeños are common, but letting them ripen to red produces peppers with more complex flavor and often increased heat.
Use pruning shears or a sharp knife to cut peppers from plants rather than pulling them off. Pulling can damage branches or even uproot plants.
Harvest regularly to encourage continued production. The more you pick, the more plants produce. During peak season, check plants every few days.
Handle hot peppers carefully. Always wear gloves when harvesting and processing hot varieties. The capsaicin that creates heat penetrates skin and causes burning that lasts for hours. I learned this the hard way and now never handle hot peppers without gloves.
Extending the Growing Season
Several techniques help you harvest peppers earlier and later in the season.
Black plastic mulch warms soil in spring, allowing earlier planting. Lay it over beds two weeks before planting to raise soil temperature several degrees.
Row covers or cloches protect young plants from late spring cool snaps, maintaining the warm conditions peppers need for optimal growth.
Bring potted plants indoors before frost. Peppers are actually short-lived perennials that can survive multiple seasons if protected from freezing. I’ve overwintered pepper plants indoors and replanted them the following spring for an earlier harvest.
Harvest all fruits before killing frost. Green peppers ripen satisfactorily indoors at room temperature, though the process takes several weeks.
The Rewards of Growing Peppers
Despite their specific requirements, peppers are incredibly rewarding. A well-established pepper plant can produce dozens of fruits over the course of a season. The flavor of fresh, garden-grown peppers – whether sweet bells or fiery habaneros – surpasses anything you’ll buy at the store.
There’s also something deeply satisfying about growing your own hot peppers and controlling the heat level in your cooking. Want mild jalapeños? Harvest them green and remove the seeds. Want more heat? Let them ripen to red and keep the seeds and membranes.
Start with proven varieties suited to your climate, provide the warmth and sun peppers crave, and maintain consistent care throughout the season. Within a few months, you’ll be harvesting beautiful peppers and wondering why you didn’t start growing them sooner.
That first bite of a perfectly ripe, homegrown pepper – sweet or spicy – makes all the effort worthwhile. Welcome to the wonderful world of pepper growing!